You Can Make Anything in a Blender

Up until just recently, I have been using a fairly ancient Intel Core i7-4770k. When I built this system over ten years ago it was somewhat high-end, and I'm glad to have used it for so many years, but I'm sure that plucky young lad, trying to finish college, building the best machine he could on an intern's paycheck, had no idea it would last a decade.

I had done it before, I could do it again. Older, wiser, and richer now, I went into Micro Center with a clear goal: Build a system that will perform well for 10+ years.

The new box is an absolute beast. Intel Core i9-14900k, 96 GB of DDR5 RAM, on a motherboard so fancy they had just one in the store, on display in a glass cabinet like it was on loan from the future. With this absolute weapon, this motherfucking excalibur, I was ready to render.

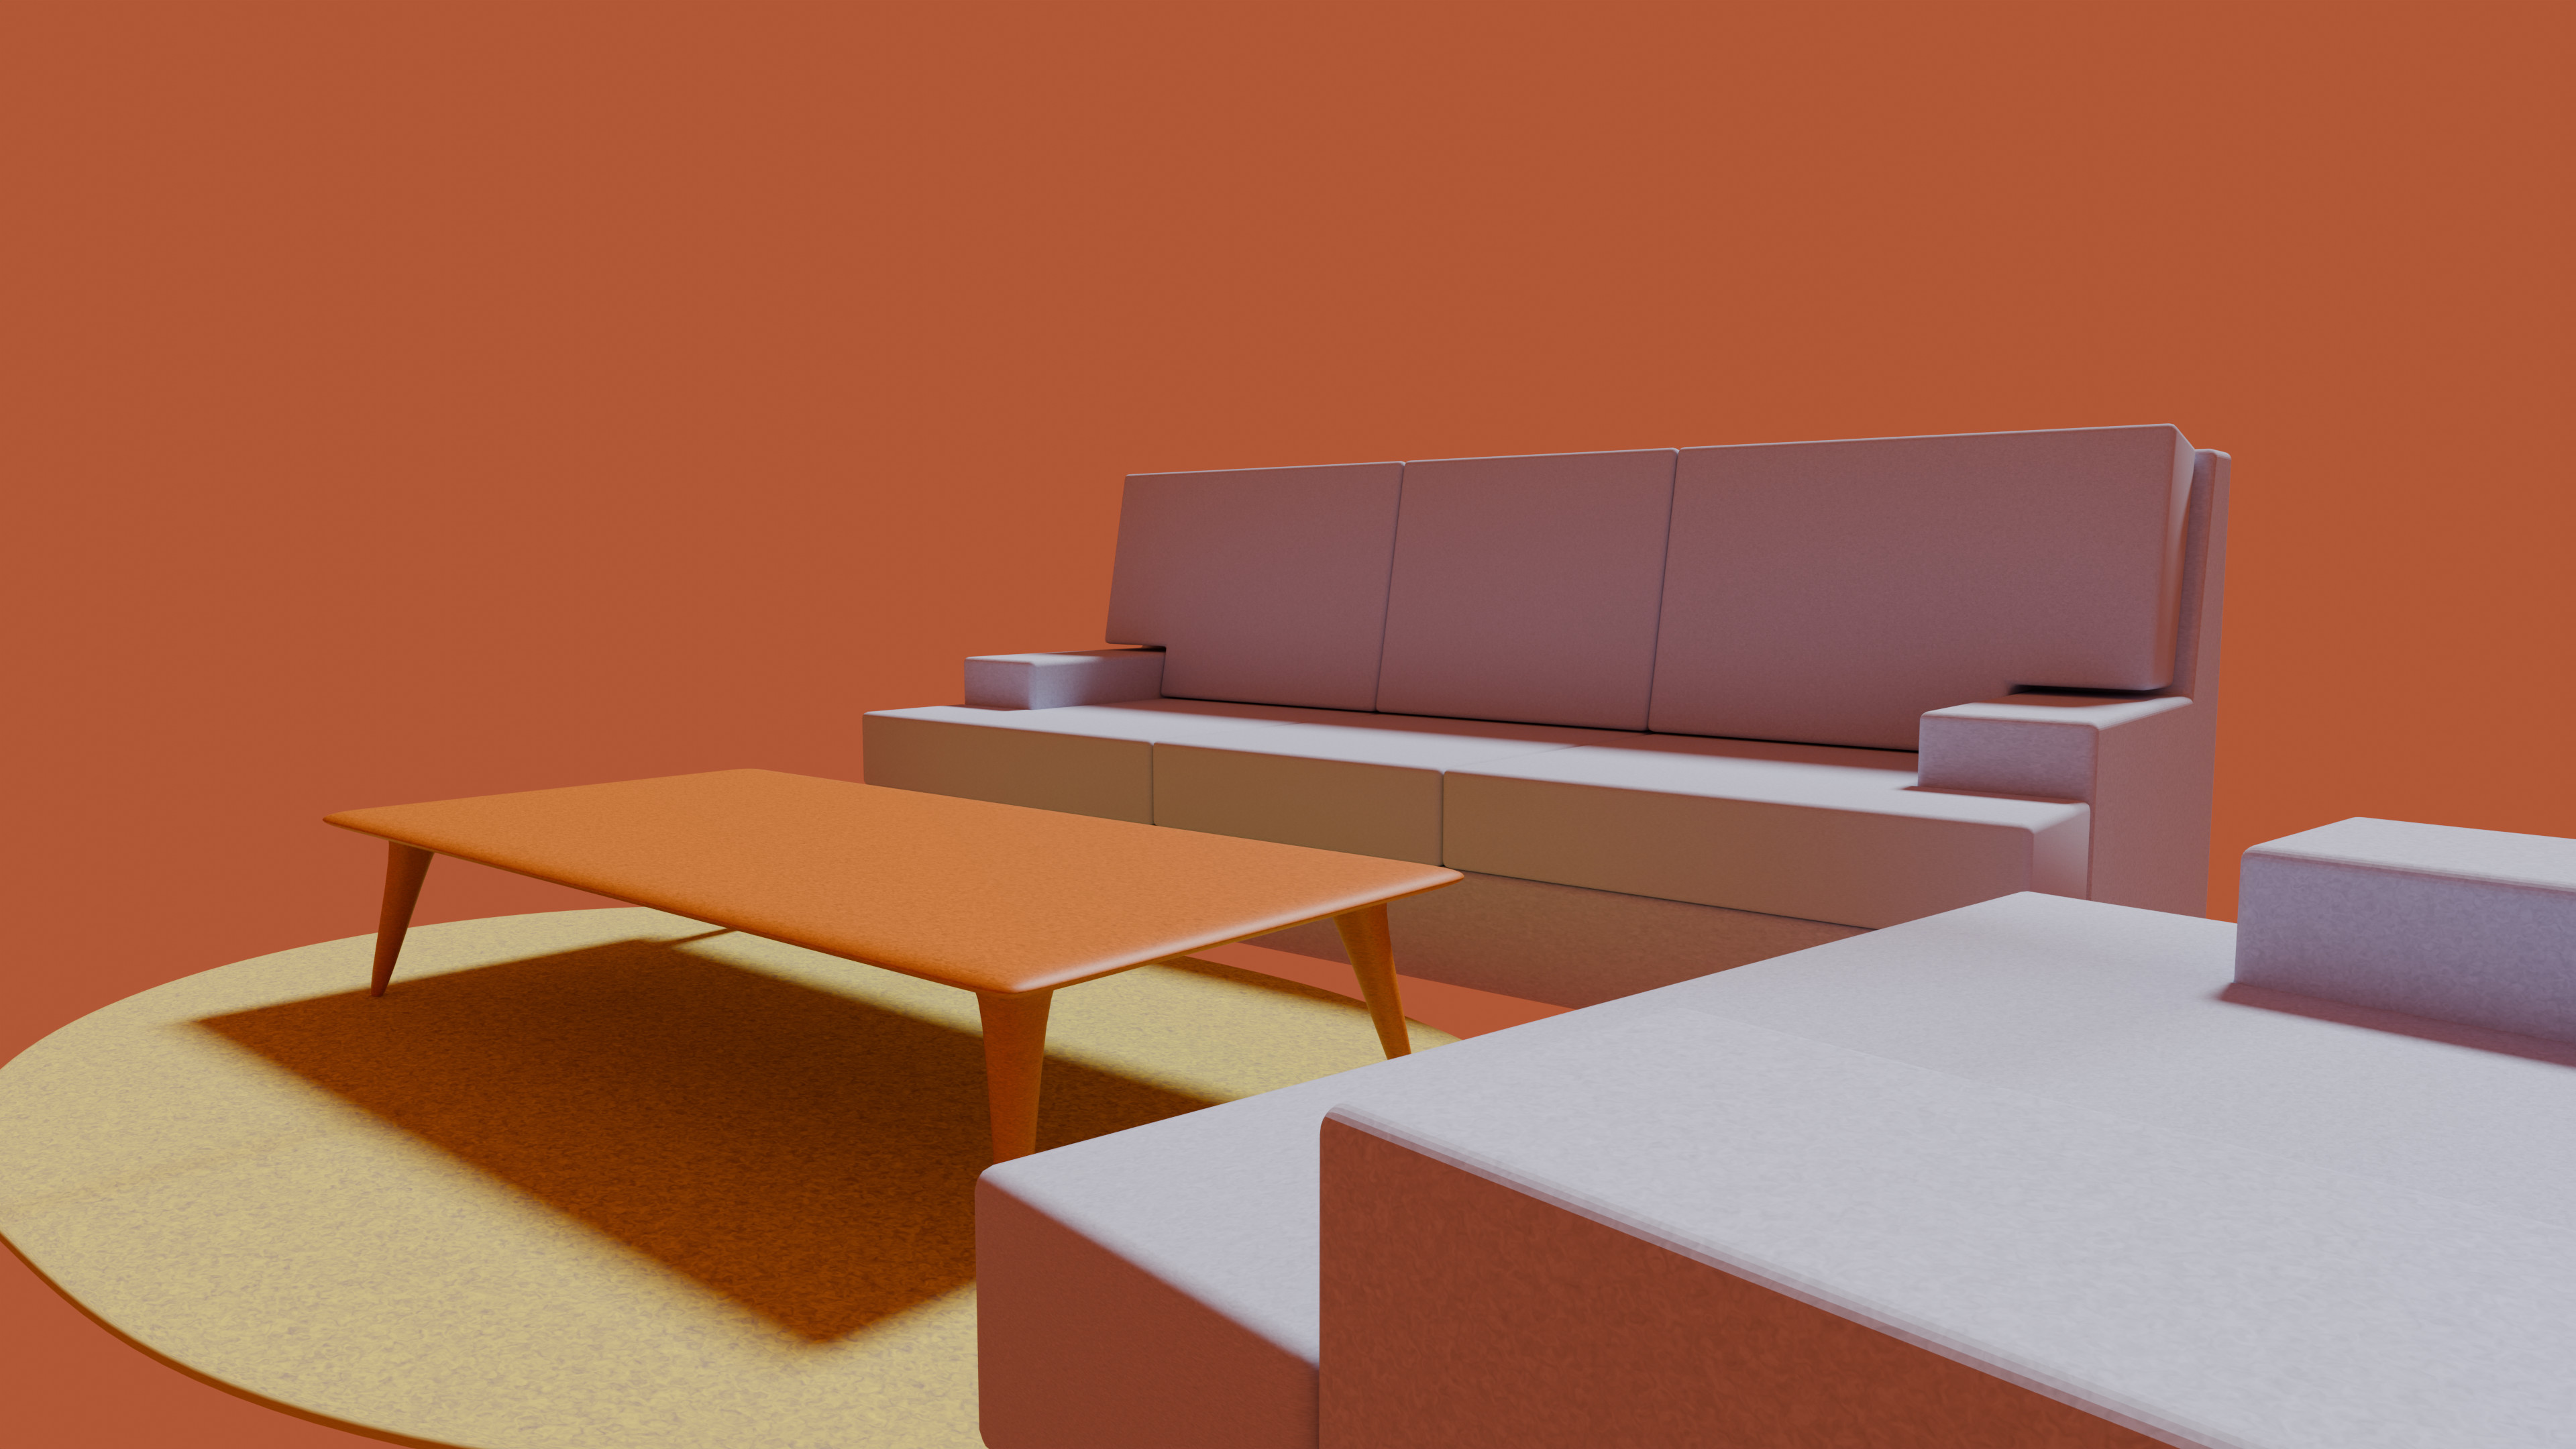
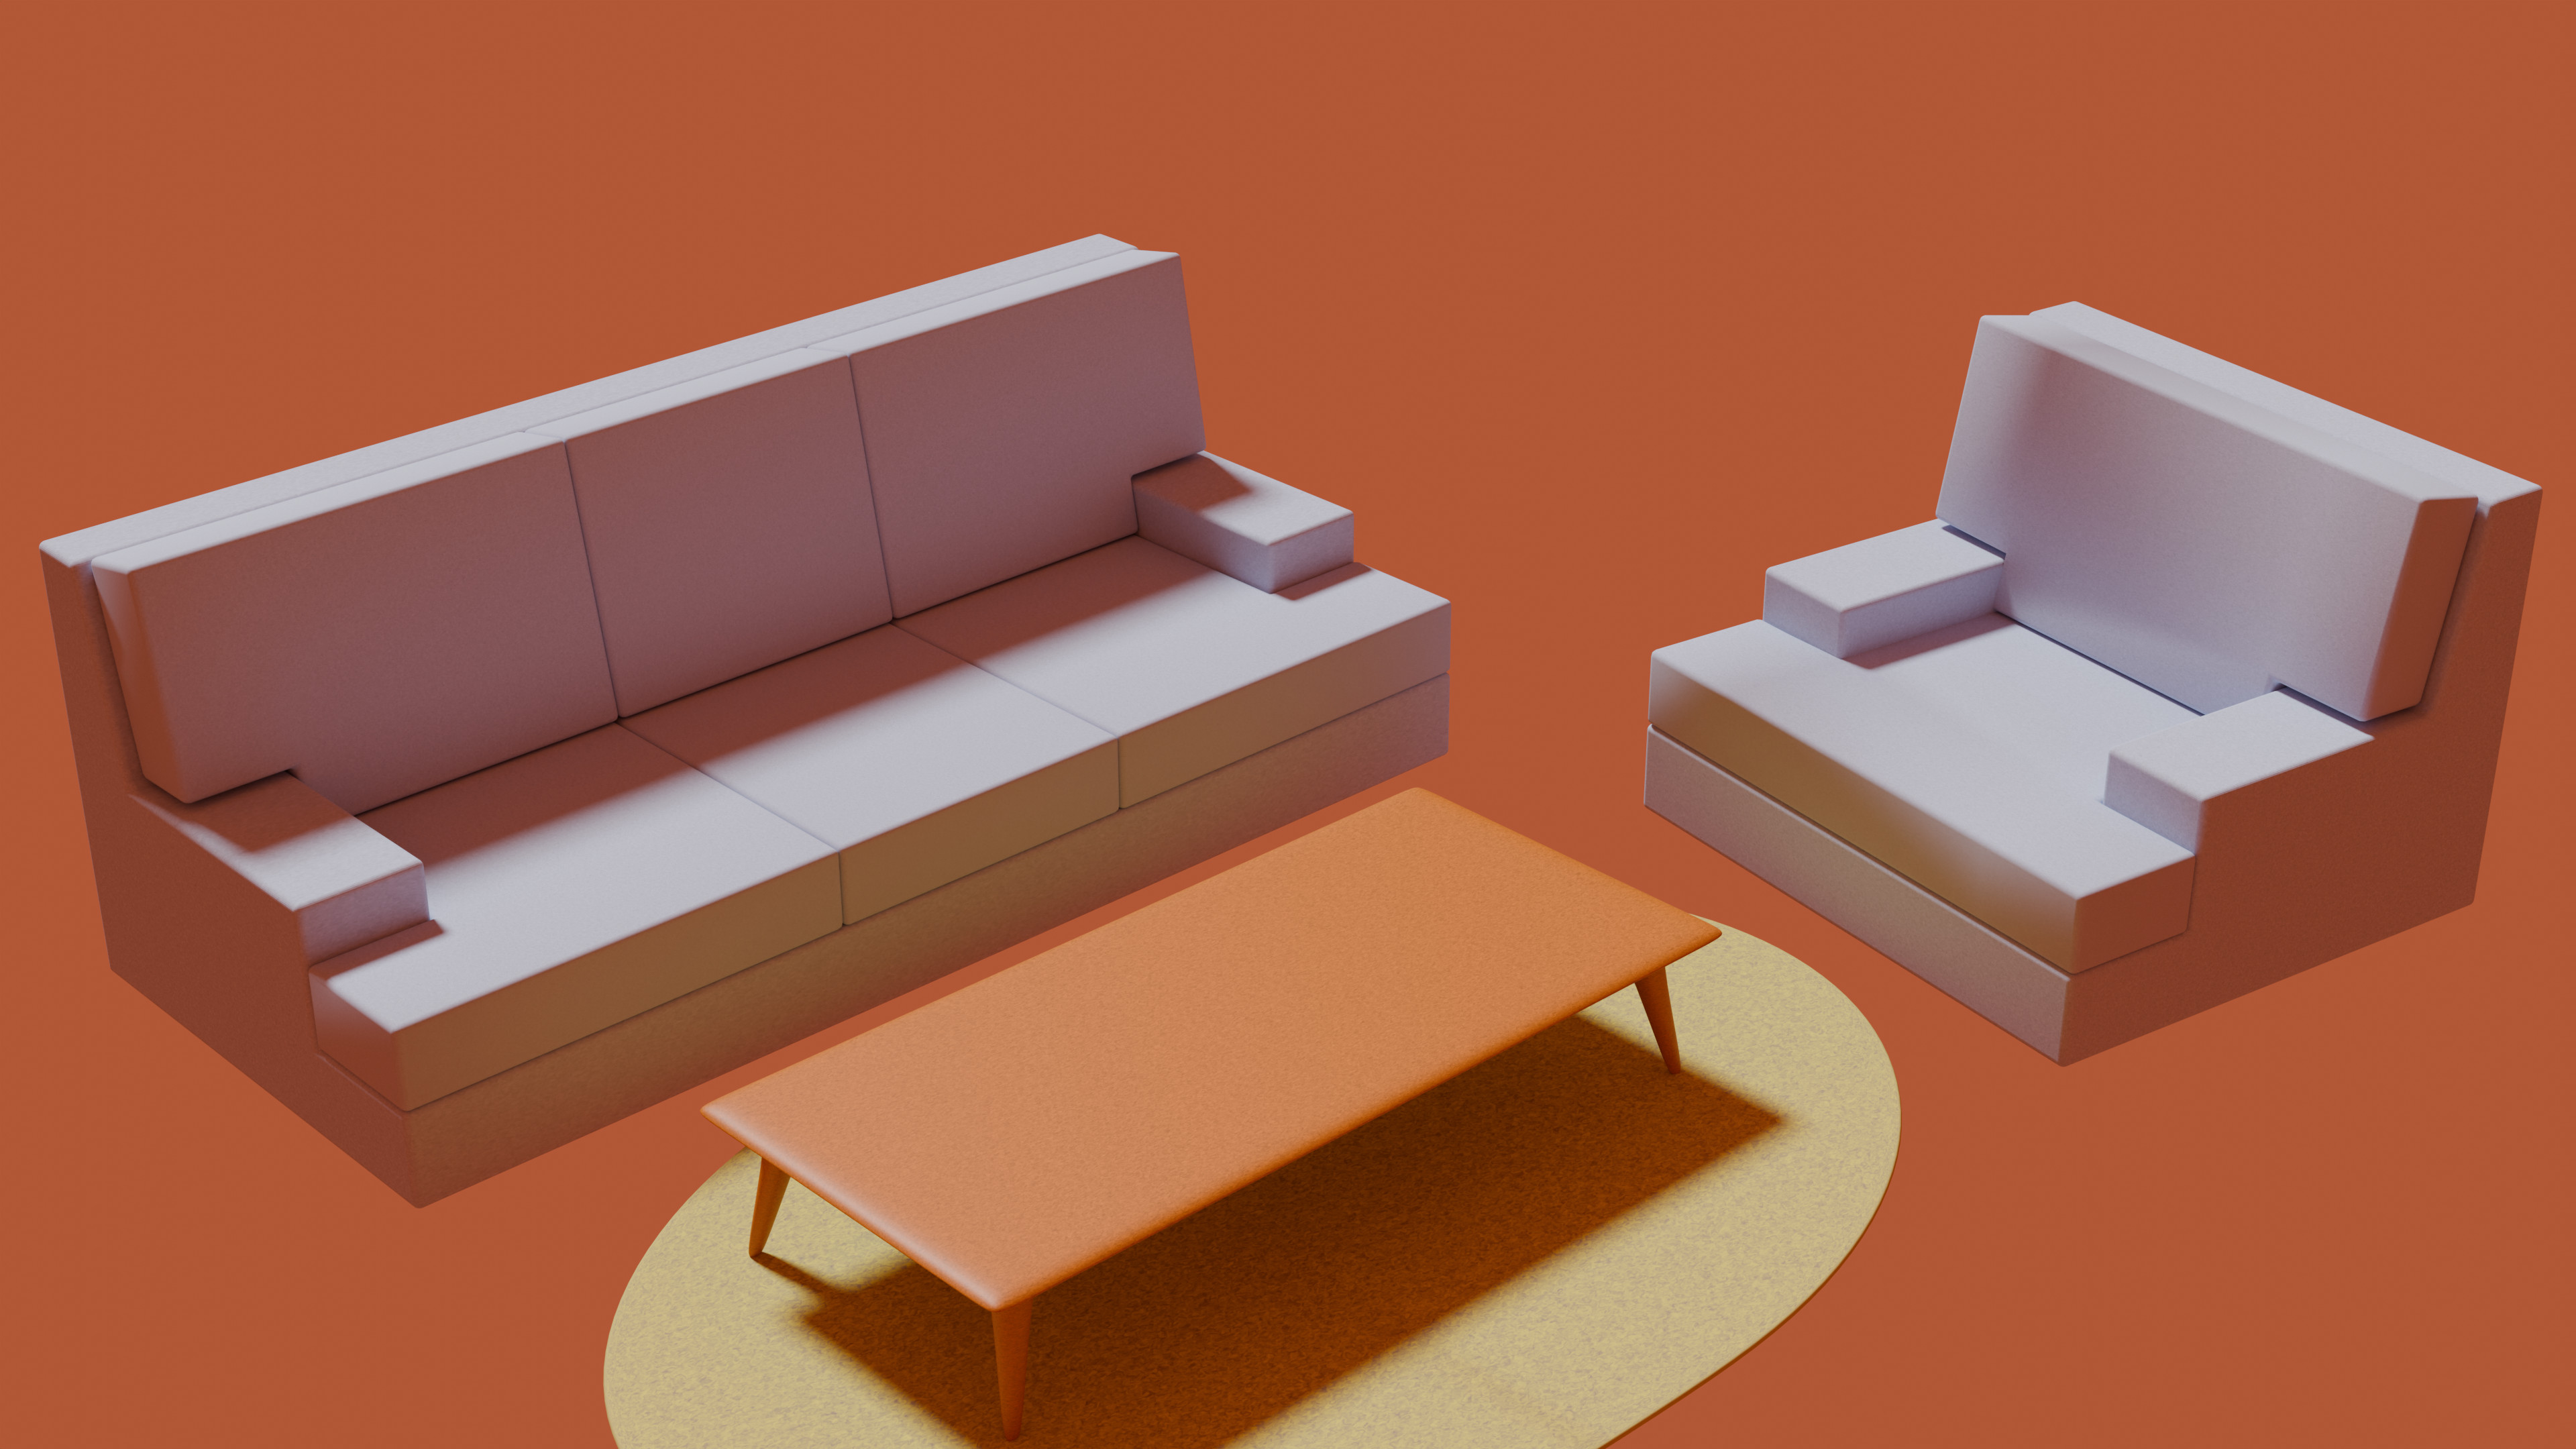
I made this living room from scratch in an afternoon. The sofa is loosely based on my home office's nap spot. I made a chair to match in the same style, then a sort of midcentury-style coffee table. The speed at which you can make things once you understand the tools is incredible.

Though I have used Blender many times in the past, enough to have some intuition and muscle memory with the pre-v2.8 keyboard shortcuts, I decided to try to check my past experience at the door and start fresh with some tutorials for absolute beginners. This got me up to speed in Edit Mode, where I had long struggled.

New (to me) is a sort of puzzle-piece editor for shaders. Boring people call these "nodes." I absolutely love this metaphor for visual programming in general, and the execution in Blender 4.0 is really excellent. Everything about the apperance of your materials can be easily described in nodes, and because you can see all of the puzzle pieces assembled together at once, you get a full picture of why your material is doing what it's doing.

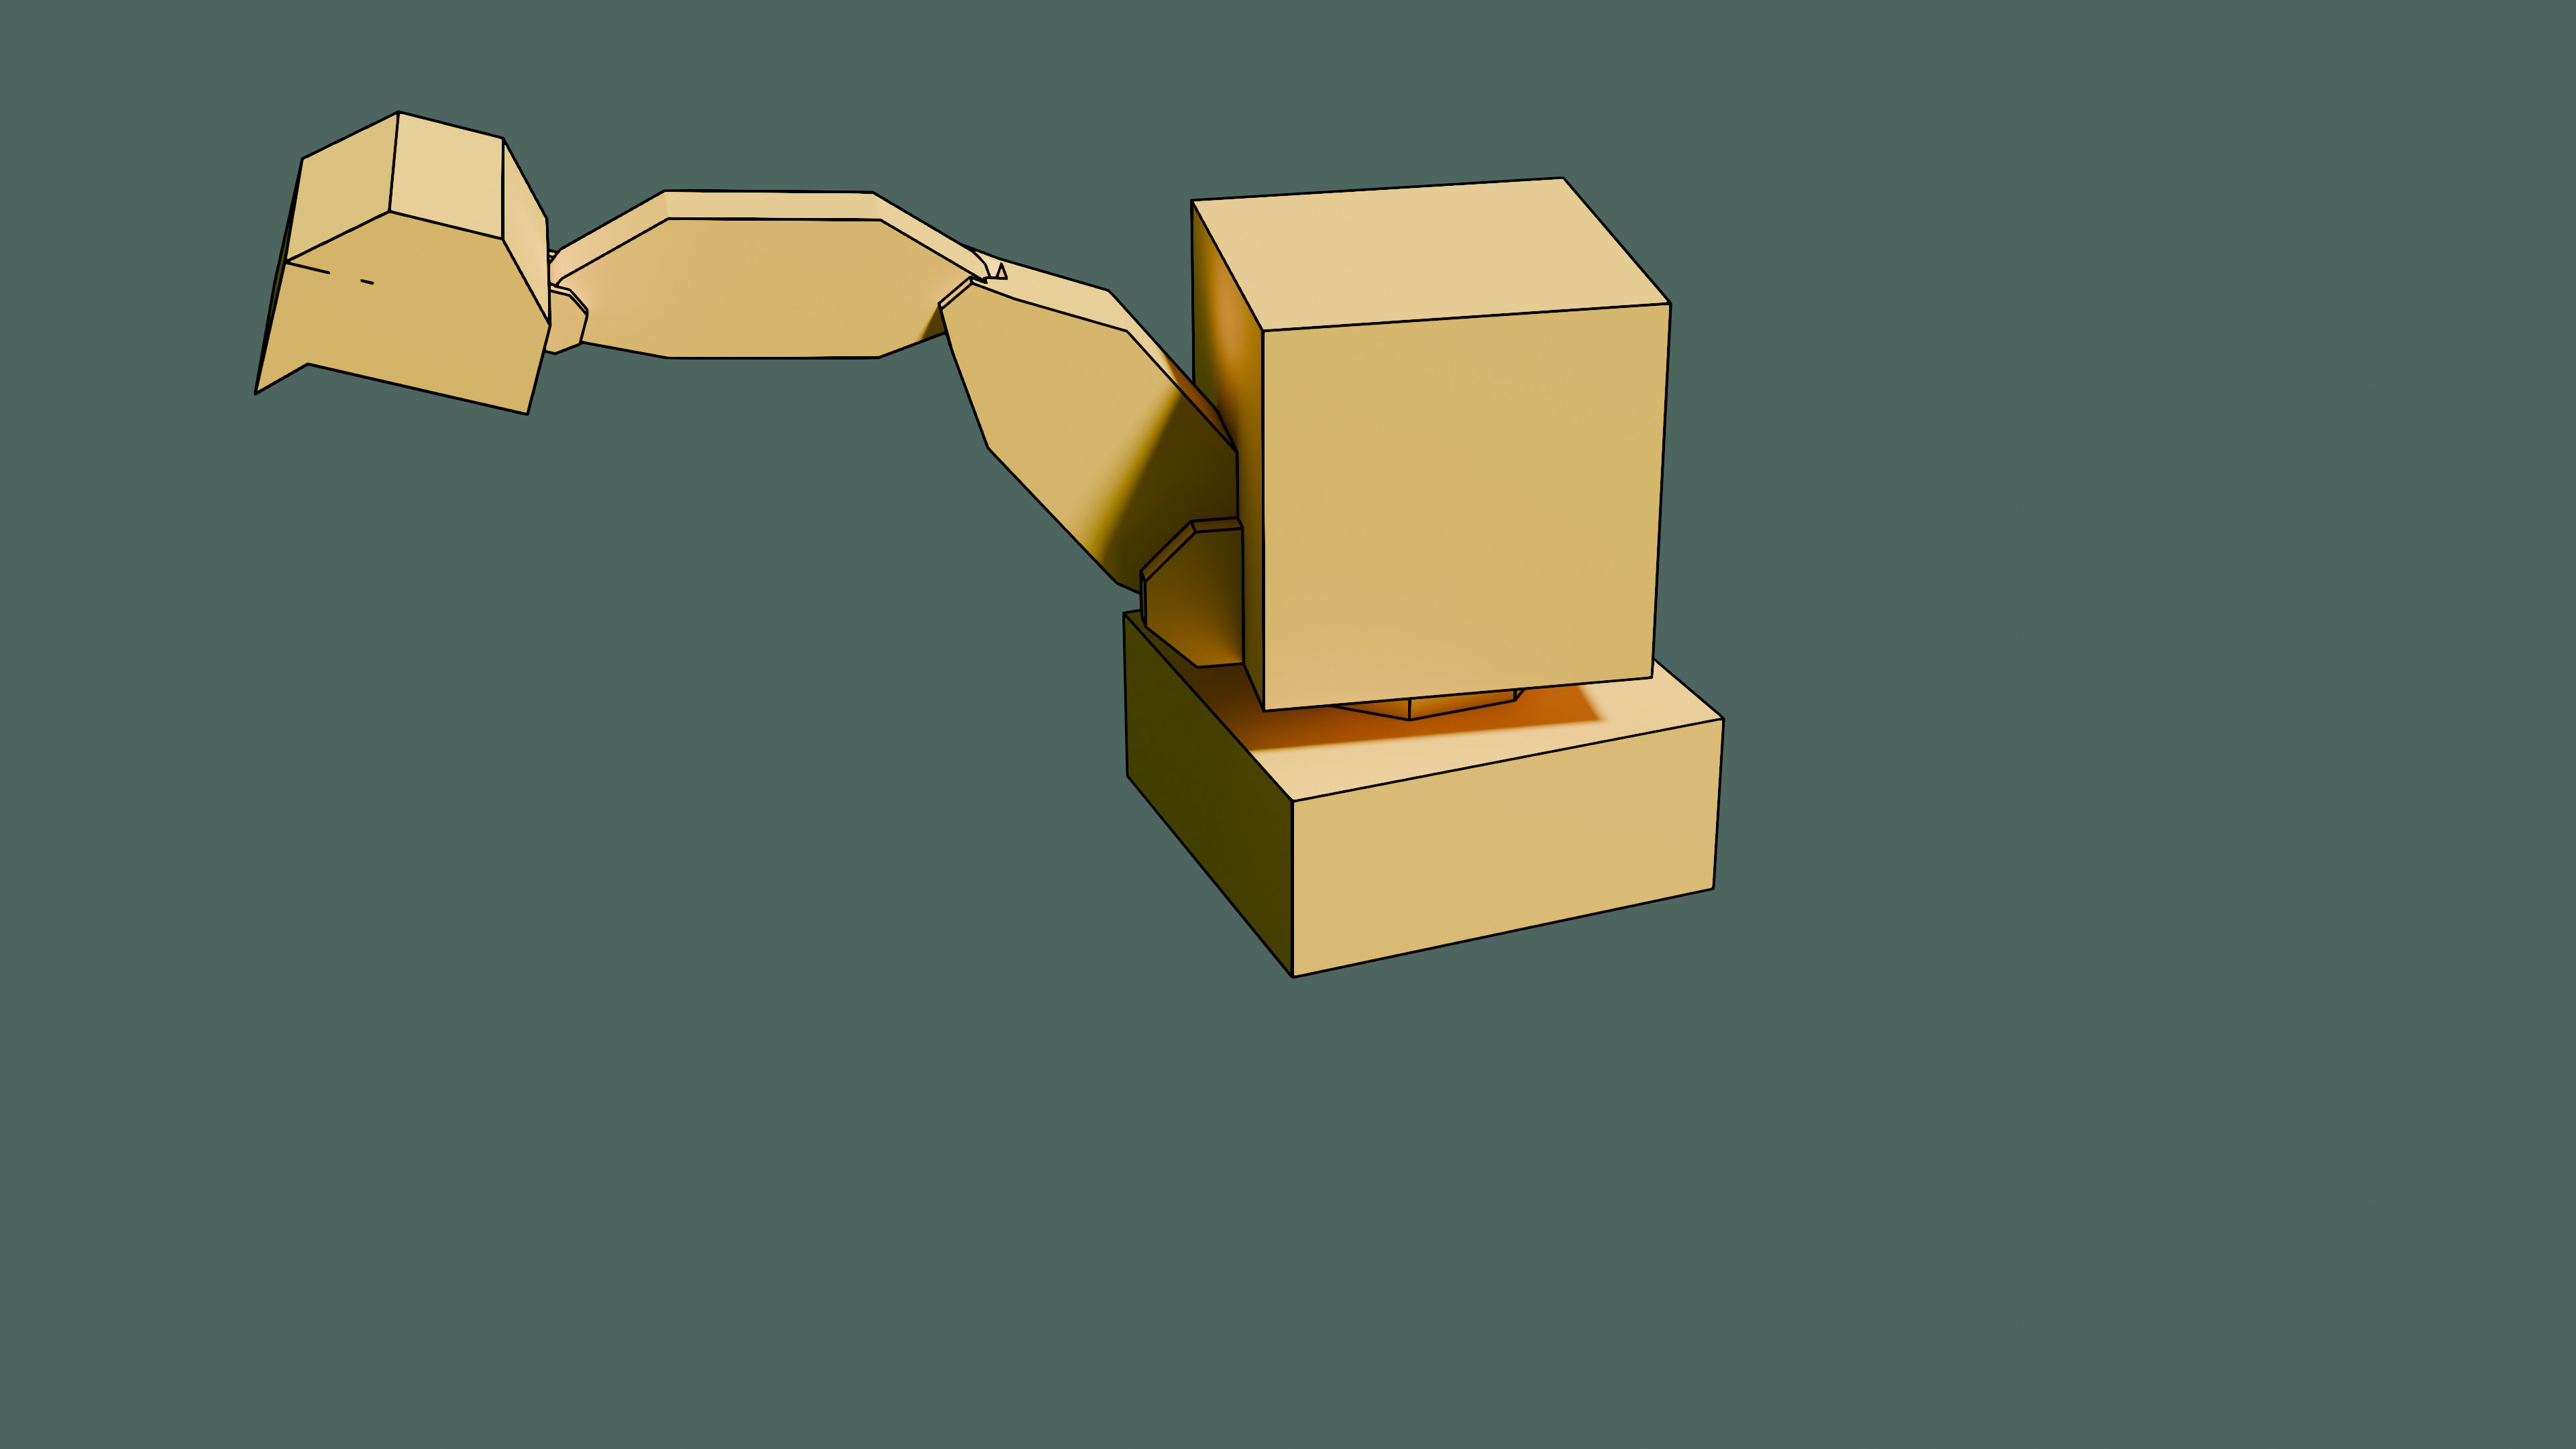
When I realized how quick and easy basic models could be built, I dove into animation. The video above is my first try at animating a machine.

Until I tried it myself, I would have thought posing an arm like this would be horrendously difficult, but with a chain of parented objects, offset origins, and relative axes, it's trivial. I'm certain that chasing photorealistic results, or truly innovative and interesting visuals is a master craft that takes untold hours of practice. I was relieved to see that the barrier to entry is not so high; that anybody who is interested and has a few hours on their hands can get satisfying results.

Yet again I find the old adage true: You don't know until you try.

Exit Interview - Quake Speed Mapping 220 Prototype Jam 3

When I saw this jam announced in the Quake Mapping discord I knew I had to put something together. Immediately I had visions of lobbies, sofas, and elevators. Months ago goofing around on bass and guitar with a loop station, I recorded an elevator music jam which would be absolutely perfect an office themed level. Track looping, I got to work...


Download and Play

You can download the entire jam including this map on slipseer.com:

Download SM 220 Prototype Jam 3

The Build

This was a speed mapping jam, and in the spirit of that, I tried to complete the entire map in three calendar days. The jam was (controversially) extended, but I did not use the extra time.

Everything came together sequentially. I started with the first lift and lobby. I spent a while just tweaking and improving the operation of the lift: How long should the ride be? How fast should it appear to be moving? When and how do the doors open? The lifts throughout the building move slow and take significant time. You can hear multiple door open/close sounds during the operation, which give it a feeling of more complex machinery. The scale of the furniture is critical... the first time in-game I rode the elevator, had the doors open, and reveal the perfectly framed sofas, it felt incredible.

Working only with the prototype textures, all some variation of either a specifically sized grid, solid color, simple pattern, etc., gives a great opportunity to create detail through brushwork. I am an absolute freak about this and relish the opportunity to create some goofy low-poly models. The first, and probably the pièce de résistance, was the CRT monitor. It's so elegant in its simplicity... the way the tube casing is offset above the centerline, and how the stand meets main body with a sloped surface creating a slim waist to contrast the bulk of the head and foot. A keyboard is represented with just a slab, whose carefully aligned grid texture draws the separation between the number pad and the main board.

The laptop computer was also a triumph, with its random, non-sensical assortment of keys, somehow giving the impression of a keyboard. What is that white thing on the top right? A pointing device? A special key? It leaves something to the imagination. This model is especially great for decorating as I was able to set the screen hinge in various positions, put laptops on theirs sides in places, etc. With both the laptop and CRT, the style is such that you could imagine this office any time from the 1980s to now.

On the second floor, the idea for the wrap-around bathroom came first. I can't explain why, but I felt like it needed to be there. As with all the other little models, I worked without reference, just drawing and carving out brushes until the most perfect porcelain throne ever to exist in a Quake map revealed itself to me. The linked duplicate grouping system in newer versions of TrenchBroom is great for symmetrical details like this. The toilet has longitudinal symmetry, so simply build half of it roughly, mirror a linked duplicate, and then refine. Every change is automatically performed on both sides, so you don't have to repeat the same operation twice.

Scale is SO hard to get right in Quake. If you look at this toilet next to the player in the map editor, it is swimming pool. When you see it in game, though, it feels just about right. I got extremely lucky with this the first time. All of the little models were the right size the first time and did not require any scale adjustments.

There are four secrets in the level, two each on each of the first two floors. I wanted it to be possible to find them all on your first play through. The somewhat complicated cinematic elevator experience meant that sending the lift back down was not really an option. I came up with the idea of a shaft you could fall down with a portal at the bottom, which would send you back to the previous level. To tempt the player to jump in, a quad damage upgrade is suspended inside, such that you can see it easily from the door but cannot reach it without going past the point of no return. I thought this was very clever, but it proved to be a point of confusion for players, who expected to be met with a swarm of powerful monsters, not the empty halls of the previous floor they had just cleared out.

The optional silver key also proved to be confusing. I wanted to reward the player for exploring, but because the key is likely to be picked up while in combat and without having seen a silver key door, many play testers didn't realize they had even picked up.

Mapping for Quake continues to be such a pleasure. It is a small window into another possible life in which I had pursued art and game development instead of accepting a career in networking software. Maybe it's a glimpse into a future career change? Who could say.

Quake 25: Slime Factory

In celebration of 25 years of Quake (1996), I decided to make a spookin'-ass Quake level of my own. Years ago I played with WorldCraft (later Hammer) making my own Half-Life levels, and although I never produced anything worth playing back then, that ancient knowledge proved useful.

Hammer is strongly tied up in the Valve ecosystem now, even more than it was back then. Poking around the Quake community, it's clear that everyone is now using TrenchBroom. And wow, I sure recommend that you do, too. The 'Broom makes it simple to shape complex brushes in a way I could never before. Instead of a series of carefully crafted carving operations, painstakingly positioned within your three standard orthographic projection views, one can essentially just draw the shape in 3D.

About the Map

You had just escaped one fortress, only to find yourself in the eerily quiet eye of the storm. Surrounded by castle walls on all sides, and the door from whence you came barred shut, you have no choice but to proceed along the dilapidated boardwalk over caustic slime lake and search on for your way out.

... and where is all that slime coming from? Something is very wrong with this green pond. The answers may reveal themselves to you with time.

This being essentially my first ever Quake map, I wanted to keep it simple. The textures are all either from the WAD used by the "start" map (Quake's episode and difficulty menu level), or some gently modified/hue shifted variant created by me. I built the ominous island structure first, and the rest of the level sprang up organically around it.

If you are feeling brave, venture into Krak's Slime Factory. Let me know if you play it (@krakissi).

(p.s.: The armor you can see from the island is quite attainable, and requires nothing more than a skilled jump.)

Download and Play

You have two options for downloading. If you already have QuakeSpasm, Mark V, or some other modern Quake engine installed, download this file which includes the playable map, as well as the source files so that you can open it up in TrenchBroom yourself. Place the BSP and LIT files in your Quake directory under id1\maps\. Launch the game, open the console with ~, and type "map krak_slimefact".

krak_slimefact.zip

If you do not have a Quake engine installed and are running Windows, download this version instead which includes QuakeSpasm and the map files. This download also includes a "Krak.bat" file which you can double-click to launch directly into the level.

krak_slimefact_wengine.zip

New Mapper Showcase

The man himself, dumptruck_ds, featured me and my little map in his ongoing "New Mapper Showcase" series on YouTube. If he weren't making videos on Quake mapping I wouldn't have made this map. It's an honor!


KrakJack: A "Fermigamo"

You have possibly heard of NaNoWriMo, a yearly November challenge for writers to author a novel in just 30 days. Completely ignoring the expansion of the acronym, I decided I would make a NaNoGaMo... a complete game in the month of November!

My NaNoGaMo idea was simple... a text-only telnet MMO, set in some remote space station. Players connect and interact with the station, and although they cannot see other players, they can see things that have been done by other players (receive mail, graffiti, position of objects, etc). It's essentially a museum game (less charitably termed a walking simulator), where you log in to hang out. The nature of telnet is such that sound is essentially impossible, and so the working title was Quiet Space.

Writing a novel is hard. Making a complete game is hard, too. I did not complete my NaNoGaMo. My ambition was too large. I had to aim smaller... and what's smaller than a nanogamo? A Picogamo! I wanted my game to be portable to at least Windows and Linux, and so I set to work creating a game engine in C++ with SDL. Almost immediately this got completely out of control, as I realized I could probably write a software 3D renderer on top of SDL's 2D-only graphics. The project is on-going and has stretched well beyond its humble beginnings. Which is to say, I did not complete my Picogamo in a month, either.

Ok, ok, I had to reel it in. Ignore the 3D renderer, just make a simple 2D game, a Fermigamo (following the natural order of Pico, Fermi, Bagel), and that's what this post is actually about. I chose a ridiculously small resolution of 256x150, and decided to make a blackjack simulator. The graphics are cute, the sounds are bloopin', and you can download it now for free on itch.io.

Low-Res EGA Graphics Demo for DOS

I put together a little demo of DOS EGA graphics in the low-resolution 640x200 mode. It's a "playable" game of bouncing balls, where the player controls one ball that can kind of move. Check out the video:

If you want to try it yourself, or check out the source code, here's a ZIP with everything as it was in the video: GFX.zip. Note that you'll have to run the executable in DOSBox or actual DOS, and that the EGAVGA.BGI file included in the ZIP needs to be in the same directory. This file is some kind of Turbo-C++ specific graphics driver... BGI perhaps standing for "Borland Graphics Interface" or similar.